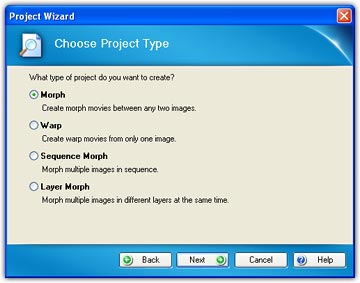
The simplest way to create a multiple morph is to
use the Project Wizard. Choose the File/New Project
Wizard menu, when the program asks you for the project type, please choose
"Multiple Morph".
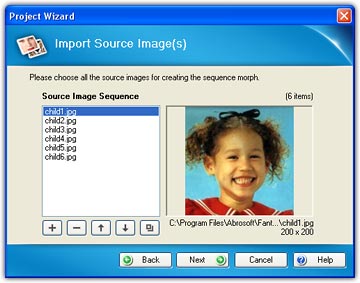
First click "+"
to choose a series of images to add to the image sequence. You can select one or
more of the images listed, then delete it (-), move it up (up arrow), or move it down
(down arrow) by clicking the appropriate edit buttons.
Once the image sequence is prepared, click "Next" button, the
program will create a multiple morph by following the image sequence through.
Then, edit key dots for each image, or add movie effects if needed. The
resulting movie is below.
Add Sequences Manually
If you want to create a multiple
morph step by step manually, please see Lesson 9.
Combine Multiple Projects
Choose the File/Append Project
menu to combine another project with the current one, repeat this operation to
combine multiple projects into one. Very useful to convert a series of separated
projects created by an old version of FantaMorph to a new project in version 3.5
format.
Use the Image Sequence
Packer
This method is just for any earlier
version before 3.5, you can ignore it if you're now using version 3.5 or later.
Assume you have chosen five source images, called A, B, C, D, E, for your morph.
You are preparing to make a flash movie, and you want to produce 15 morphed
frames between each two successive source images. It is relatively easy to
create a long morph movie using these 5 images by following the following steps.
1. Make project "Morph1" by importing A as "Image 1" and B
as "Image 2", then export the resulting image sequence in your chosen format.
(For this example, we will use JPEG.) You now have 15 image files named
Morph101.jpg, Morph102.jpg, and so on, through Morph115.jpg.
2. Swap source images from the Edit menu. Now B is
"Image1" and A is "Image 2", then import C as "Image 2" and save the project as
"Morph2". Adjust key dot positions on C; add new key dots, or delete key dots,
as necessary. Export this image sequence to get files named Morph201.jpg through
Morph215.jpg.
3. Repeat step 2, using source images C and D and saving
the project as "Morph3".
4. Again, repeat step 2, using source images D and E and
saving the project as "Morph4".
5. Run "Image Sequence Packer" from the Tools menu, adding
all 60 images, Morph101.jpg through Morph115.jpg, Morph201.jpg through
Morph215.jpg, Morph301.jpg through Morph315.jpg and Morph401.jpg through
Morph415.jpg. Choose the "Flash Movie" option, then press the "Start Pack"
button. That's all it takes! See more about "How
to Use Image Sequence Packer".