How to Import Source Image
< Back
Index
Next >
There are 5 ways to import
source image into FantaMorph.
Button or Menu
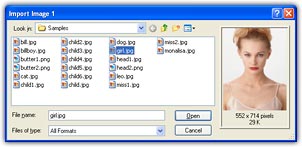
As described in
Lesson 1, the simplest way is to click Import Image
button or the Image/Import Image menu, then choose an image file from the
Import Image window as shown below.
Source Panel
Double click directly on one of the
two source panels to launch the Import Image window.
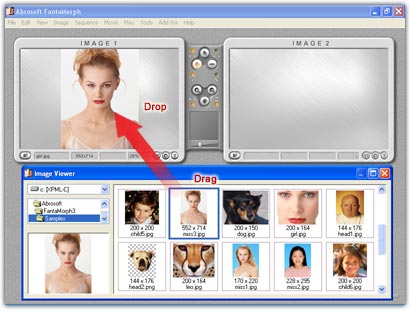
Drag from Built-in Image
Viewer
When choosing from many source
files, finding a particular source image may be difficult. In this case, press
the CTRL + F1 key or choose the Add-Ins/Image Viewer menu, and the image
viewer will appear. Adjust its window size and position as suited for viewing.
Use this simple, fast tool with thumbnail previews to explorer all supported
image resources on your disks. Click on the desired file and drag it to the
image area in the main interface.
Drag from External Program
You may also drag an image file to
the main interface from an external program such as Windows Explorer or ACDSee.
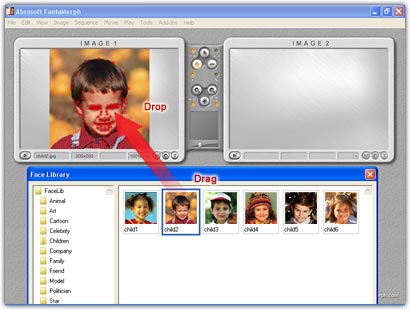
Drag from Face Library
Beginning with version 4.0, you can
drag a face from the Face Library to the image area in the main interface. In
this way you can also get the aligned key dots that has been stored in Face
Library.
Back to top
