With Abrosoft FantaMorph, you can create morph movies between any two images, or
you can create warp movies from only one image. You will find that making warps
is somewhat easier than creating morphs. Create warps at warp speed!
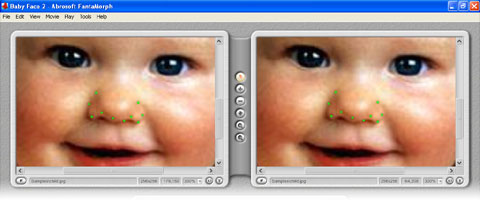
To create a warp effect, first load the same image to Image 1 and Image 2. Note,
if you use FantaMorph version 3.5 or later, you should now choose the
Sequence/Morph Type menu and set the morph type to "Warp Image 1".
Place one dot on the source image and FantaMorph automatically places another
dot on the corresponding coordinates of the target image. For example, if we
want to warp the baby's nose, we first add a dot to the area of the nose.
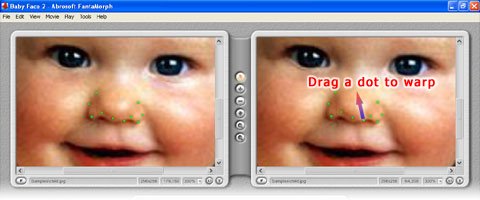
Leaving the dot in its original position "anchors" that area of the image
preventing that part of the image from being morphed. Moving it from its
original position will create a warp effect.
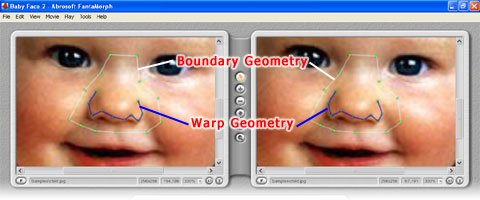
Moving a dot warps the entire image, which may not be the result you desire. It
is very important to anchor portions of the image using Boundary Dots. As
shown below, we've added dots to the nose as warp geometry (blue line). Then, we
added dots around the nose area as a boundary (white line). Note: the lines are
for illustration purposes only and won't be displayed in FantaMorph.
Important Notice: Beginning with version 4.1, you may need to hold the
ALT key and click to add boundary dots.
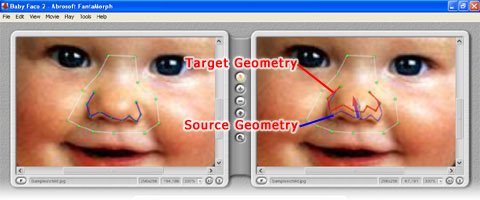
Now, you can freely drag
the warp dots on Image 2 from source geometry positions (blue line) to target
geometry positions (red line) to obtain a warp effect. As you see, only the area
inside the boundary (white line) will be warped, while the area outside the
boundary won't be changed.
This gives us the desired final effect, as shown below.