Lesson 2 - Edit Source Image
Sometimes, we don't wish to morph an entire image. Particularly with digital camera images, you will find that you only wish to work with a portion of the image. You don't need to use any other software: FantaMorph's built-in crop tool can help you.
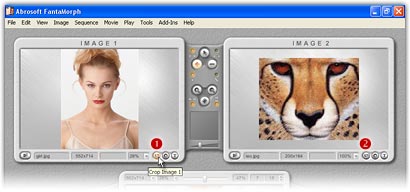
1. Click the Crop
Image 1 button (![]() )
for image 1 or click the Crop Image 2 button (
)
for image 1 or click the Crop Image 2 button (![]() )
for image 2 on the edit panel, you can also choose the Image/Crop menu.
)
for image 2 on the edit panel, you can also choose the Image/Crop menu.
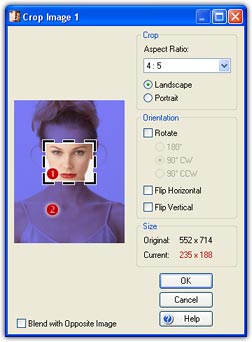
2. In the Crop Image 1 window, the selected
Portion (![]() )
can be dragged directly and resized by dragging one of the 8 cropping handles
around it. The unselected portion (
)
can be dragged directly and resized by dragging one of the 8 cropping handles
around it. The unselected portion (![]() )
shown with blue mask will be removed. There are some advanced controls on the
right.
See more...
)
shown with blue mask will be removed. There are some advanced controls on the
right.
See more...
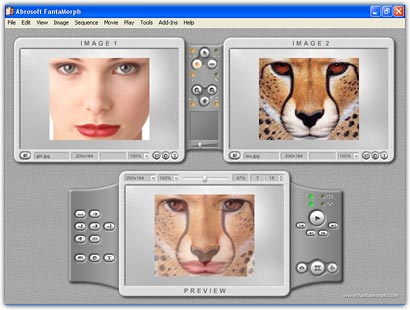
3. We have now cropped two source images and the morph movie has been recreated automatically at a size suitable for those images. Note, these two source images may be of different sizes cropped, and they will still be resized to fit the morph movie.
4. There is another useful tool for image adjustment. With it, you can adjust brightness, contrast, hue, saturation, color balance, etc. You can also add some filters such as blur, sharpen, emboss, etc. See more... Beginning with version 4.0, you can also add caption on source images without having to use any other software. See more...